How to Build the Perfect Sandwich: A Culinary Guide to Deliciousness


The sandwich, in its infinite variations, is a culinary chameleon. It’s equally at home as a quick lunch, a sophisticated brunch offering, or a satisfying dinner. The key to a truly exceptional sandwich lies in understanding the interplay of textures and flavors. A well-built sandwich offers a balance of savory, tangy, creamy, and crisp elements, all held together by the perfect bread.
This guide will walk you through the essential components of a great sandwich, exploring different fillings, preparation techniques, and serving suggestions. We’ll move beyond simple assembly to teach you the principles of sandwich construction, ensuring that every bite is an explosion of flavor and a textural delight.
Understanding Sandwich Bread
The foundation of any great sandwich is, of course, the bread. Different breads impart different flavors and textures, impacting the overall experience. Here are a few common types to consider:
- Soft White Bread: The classic choice, providing a neutral flavor and soft texture. Best for fillings with bold flavors that need a subtle backdrop.
- Whole Wheat Bread: Adds a nutty flavor and hearty texture. A good choice for healthier sandwiches or those with robust fillings.
- Rye Bread: Offers a tangy, slightly sour flavor that pairs well with savory meats like corned beef or pastrami.
- Sourdough Bread: A distinctive sour flavor and chewy texture. Excellent for grilled sandwiches or those with rich fillings.
- Focaccia: An Italian flatbread with a soft, airy texture and herbaceous flavor. Ideal for open-faced sandwiches or those with Mediterranean-inspired fillings.
- Rolls & Sub Buns: Hearty and substantial, these are great for substantial fillings that need a sturdier base.
Why Cook Sandwiches This Way?
- Versatility: Sandwiches can be adapted to any cuisine or dietary restriction.
- Flavor: Layering different ingredients allows you to create complex and satisfying flavor combinations.
- Convenience: Sandwiches are quick and easy to prepare, making them perfect for busy weeknights or on-the-go lunches.
Preparation (Mise en Place)
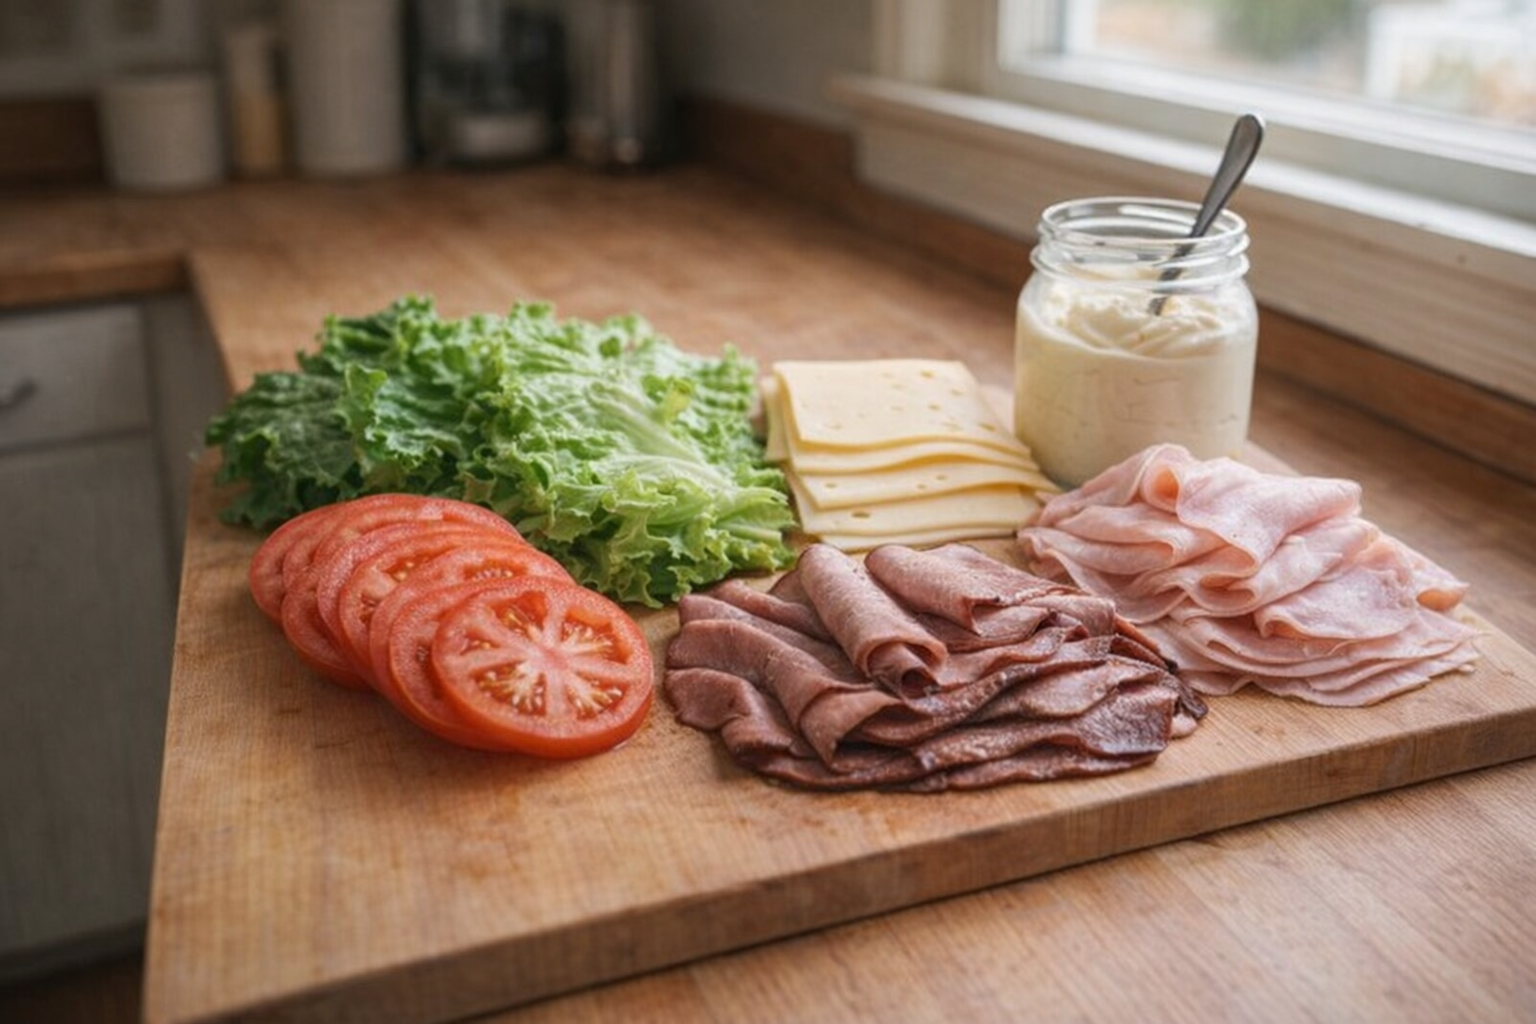
Before you begin assembling your sandwich, take a moment to prepare all the ingredients. This "mise en place" (French for "everything in its place") will streamline the process and ensure that your sandwich is perfectly balanced.
- Prepare Fillings: Slice meats, cheeses, and vegetables. Prepare any spreads or sauces.
- Toast (Optional): Toasting bread adds texture and prevents it from becoming soggy.
- Assemble Condiments: Have your favorite condiments readily available.
Essential Tools
- Bread Knife: For slicing bread evenly. A serrated edge is ideal.
- Cutting Board: A stable surface for slicing and prepping ingredients.
- Spreading Knife: For applying spreads and sauces evenly.
- Grill Pan (Optional): For grilling sandwiches.
The Cooking Method(s)
While some sandwiches are best served cold, others benefit from a little heat. Here are a few popular methods:
Method 1: Cold Assembly
This is the most common method for making sandwiches. Simply layer the ingredients onto the bread and serve.
Ingredients:
- 2 slices of your chosen bread
- 2-3 tablespoons of spread (mayonnaise, mustard, hummus, etc.)
- 2-3 slices of cheese
- 2-3 slices of deli meat
- Lettuce
- Tomato slices
- Other desired toppings (pickles, onions, etc.)
- Lay the bread slices on a clean surface.
- Spread the chosen spread evenly on both slices of bread.
- Layer the cheese, meat, lettuce, tomato, and other desired toppings on one slice of bread.
- Top with the second slice of bread, spread-side down.
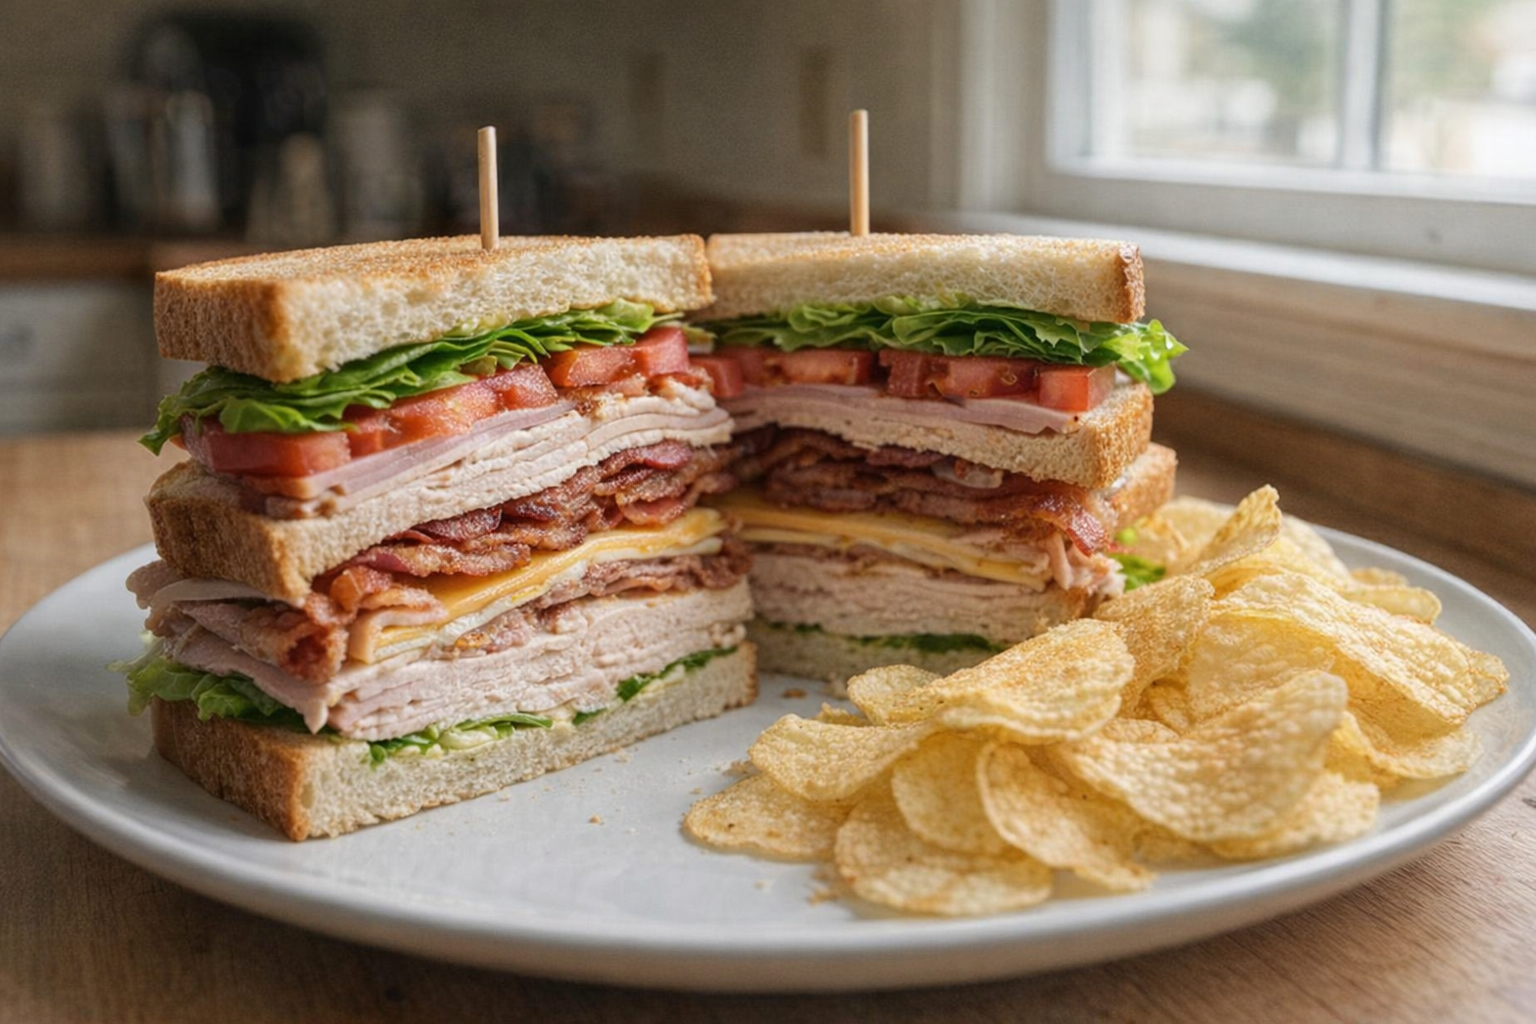
- Cut the sandwich in half (optional) and serve. The act of cutting the sandwich allows you to examine your work. Ensure there is balance of color and ingredients.
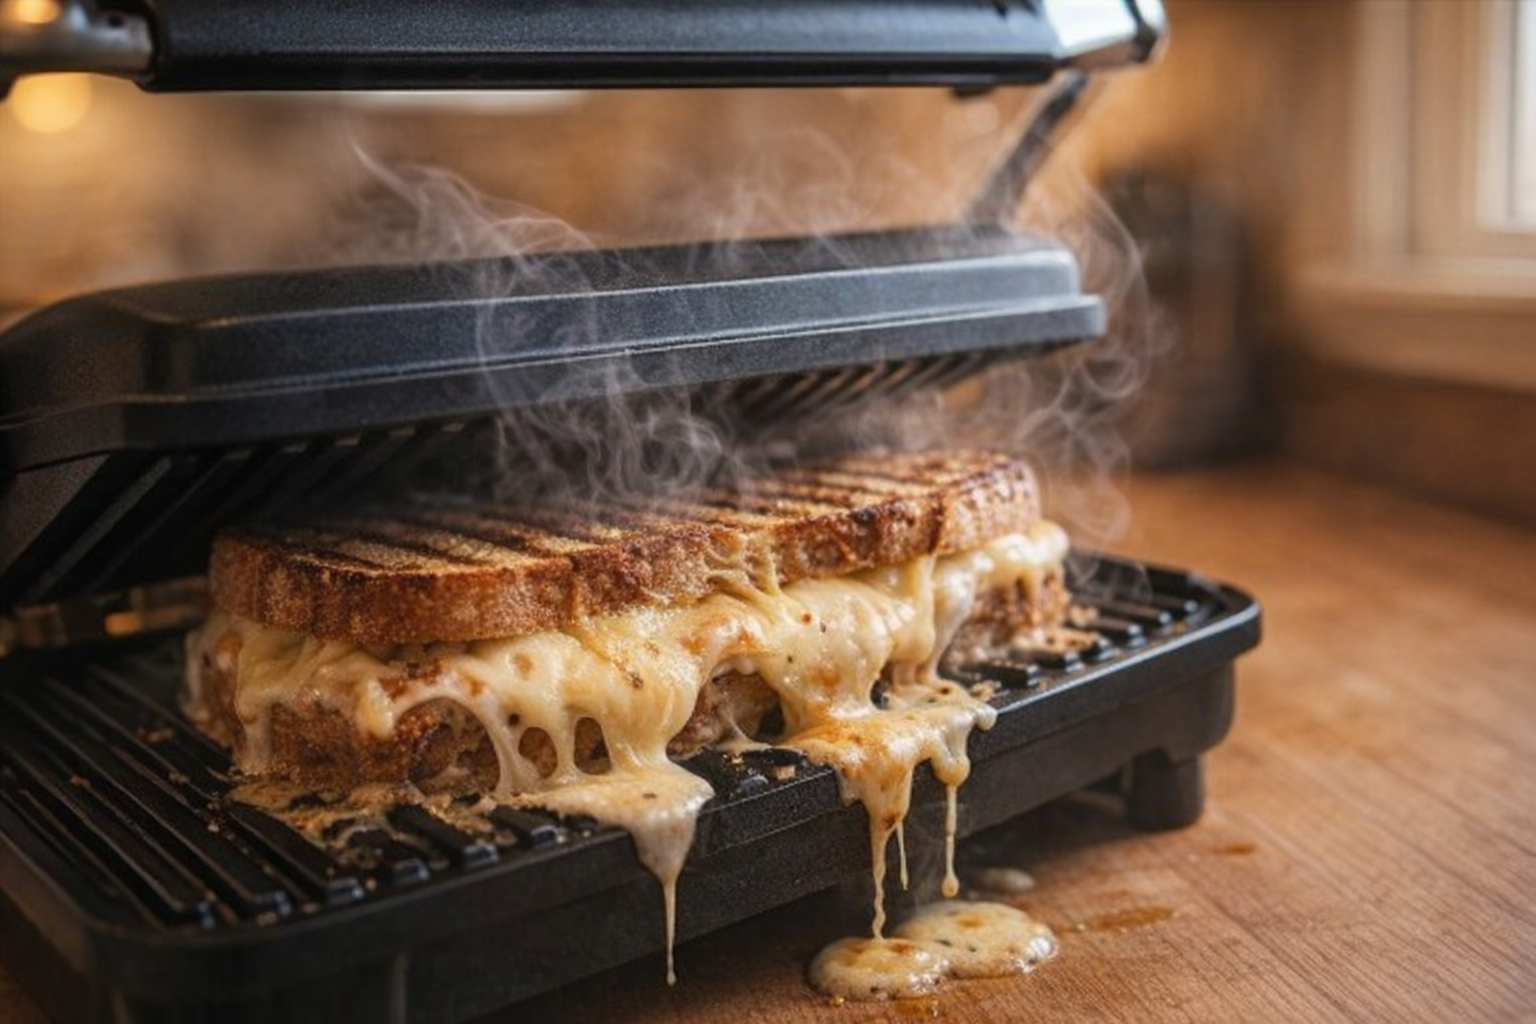
Method 2: Grilled or Panini-Pressed
Grilling or panini-pressing a sandwich adds warmth, texture, and flavor.
Ingredients:
- 2 slices of your chosen bread (sourdough or panini bread works well)
- 2-3 tablespoons of butter or olive oil
- 2-3 slices of cheese (cheddar, mozzarella, provolone)
- 2-3 slices of deli meat (ham, turkey, salami)
- Other desired fillings (roasted vegetables, pesto)
- Butter or brush the outside of each slice of bread with olive oil.
- Layer the cheese, meat, and other desired fillings on one slice of bread.
- Top with the second slice of bread, butter-side up.
- Heat a grill pan or panini press over medium heat.
- Grill the sandwich for 3-5 minutes per side, or until the bread is golden brown and the cheese is melted and gooey.
- Cut the sandwich in half and serve immediately.
Cooking Time & Doneness Guide
- Cold Sandwiches: Ready immediately after assembly.
- Grilled Sandwiches: 3-5 minutes per side, or until golden brown and cheese is melted. Internal temperature is not applicable for most grilled sandwich fillings.
Visual Cues
- Grilled Sandwiches: The bread should be golden brown and crispy, and the cheese should be melted and bubbly.
Tips for Perfection
- Don't Overcrowd the Sandwich: Too many fillings will make it difficult to eat and can cause the bread to become soggy.
- Use Fresh Ingredients: Fresh ingredients will result in a more flavorful and satisfying sandwich.
- Spread Condiments Evenly: This will ensure that every bite has a balanced flavor.
- Press Down Gently: When grilling a sandwich, press down gently to ensure even cooking.
Storage & Reheating
- Storage: Cold sandwiches can be stored in the refrigerator for up to 24 hours. Grilled sandwiches are best eaten immediately, but leftovers can be stored in the refrigerator for up to 24 hours.
- Reheating: Grilled sandwiches can be reheated in a toaster oven or skillet over medium heat. Reheating cold sandwiches is not recommended, as the bread may become soggy.
Serving Suggestions
- With Soup: A classic pairing, especially on a cold day.
- With Salad: A light and refreshing accompaniment.
- With Chips or Fries: A satisfying and indulgent side.
- Cut into Triangles: Makes a great appetizer or snack.
💡 Pro Tips
- Toast your bread lightly to create a sturdy foundation that resists becoming soggy from wet ingredients.
- Spread condiments all the way to the edges of the bread to act as a protective seal against moisture.
- Place denser ingredients like proteins and cheeses at the base to provide a stable foundation for lighter toppings.
- Lightly salt and pepper sliced tomatoes and cucumbers before assembly to draw out their juices and intensify the overall flavor profile.
- Use a sharp serrated knife to cut the sandwich on a diagonal, which makes it easier to handle and improves the presentation.
Frequently Asked Questions
To prevent a soggy sandwich, try toasting the bread lightly to create a barrier against moisture. You can also spread a thin layer of butter, mayonnaise, or a similar spread on the bread to act as a waterproof layer before adding wetter fillings.
Ingredient substitutions depend on the specific ingredient, but generally, you can substitute similar types of bread like using ciabatta if you don't have focaccia. For fillings, consider swapping out meats or cheeses with similar flavor profiles, or using different vegetables you have on hand.
A prepared sandwich is best consumed within 1-2 days of making it. Wrap the sandwich tightly in plastic wrap or store it in an airtight container in the refrigerator to prevent it from drying out or absorbing odors. It's best not to refrigerate sandwiches with very wet ingredients like tomatoes for extended periods as they can make the bread soggy.
To achieve a balanced flavor profile, think about incorporating all the essential taste elements: salty, sweet, sour, bitter, and umami. Try adding a pickle or pickled onion for acidity, a smear of honey mustard for sweetness and tang, and a sprinkle of herbs for freshness and aroma to create a more layered and satisfying sandwich experience.